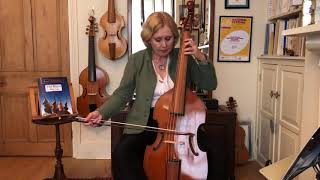
Hello viol players – in these times of self isolation, I thought it would be a good idea to learn how to refret your viol.
This is the first upload to my new YouTube channel. Enjoy and share!
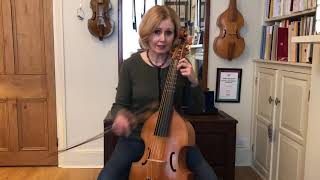
Lesson 7 Shifting using Chordal Fingering and How to Play Faster
Viol Player Book 3
• p29 Another way to shift using Chordal Fingering
• No 1 & 2 Pivot on 3rd finger, letting go with everything, including the thumb, and placing fingers in the new position.
All the weight goes into your 3rd finger, so the rest of the hand is relaxed enough to find the new position. Check thumb to see if it’s moved: Shifting from half position from first position.
• P31 No 1 Thumb needs to follow the 2nd finger when shifting. Practice the movement in bar 2 on its own, to get the feel of it.
• P30 no 19 Great Tom is Cast: using Chordal Fingering to enable us to shift.
• P31. No 3 starting from bar 4 to ‘feel’ the shift. Check the position of your thumb when finishing the piece. Chapter 5
• P42 The Bear’s Dance: Starting with bar 4 to practice the shifts in the quavers. Try not to look at the left hand when shifting, just feel the shift. The piece starts in first position for the octave Gs to reduce the string crossing.
• Open string version: wrist movement on the semiquavers. Comparing bar 2 and the last bar and how the semiquavers fall on alternate bows. Practice with dynamics on the open string version. Learning the piece line by line of the open string version, then the complete version.
• P34 No 23 Under the Linden Tree
• Finding Chordal fingering from the top note from an open string by feeling your way on the viol. Becoming fluent with chordal fingering and using it to shift. Looking at how long fingers can stay down. Listening to the tone on top string and where the bow needs to go in relation to the bridge to get a beautiful sound. Practising slowly to enable faster playing.
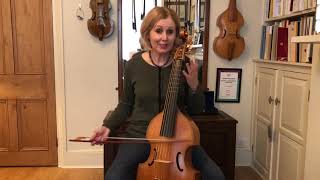
Lesson 8 Stuck in Half Position? & Sight Reading Tips
Viol Player Book 3
• p29 Another way to shift using Chordal Fingering
• No 1 & 2 Pivot on 3rd finger, letting go with everything, including the thumb, and placing fingers in the new position. All the weight goes into your 3rd finger, so the rest of the hand is relaxed enough to find the new position. Check thumb to see if it’s moved: Shifting from half position from first position.
• P31 No 1 Thumb needs to follow the 2nd finger when shifting. Practice the movement in bar 2 on its own, to get the feel of it.
• P30 no 19 Great Tom is Cast: using Chordal Fingering to enable us to shift.
• P31. No 3 starting from bar 4 to ‘feel’ the shift. Check the position of your thumb when finishing the piece.
Chapter 5
• P42 The Bear’s Dance: Starting with bar 4 to practice the shifts in the quavers. Try not to look at the left hand when shifting, just feel the shift. The piece starts in first position for the octave Gs to reduce the string crossing.
• Open string version: wrist movement on the semiquavers. Comparing bar 2 and the last bar and how the semiquavers fall on alternate bows. Practice with dynamics on the open string version. Learning the piece line by line of the open string version, then the complete version.
• P34 No 23 Under the Linden Tree
• Finding Chordal fingering from the top note from an open string by feeling your way on the viol. Becoming fluent with chordal fingering and using it to shift. Looking at how long fingers can stay down. Listening to the tone on top string and where the bow needs to go in relation to the bridge to get a beautiful sound. Practising slowly to enable faster playing.
Lesson 9 Playing fast with Alexander Technique
Chapter 6
• P46 No 31 Lilliburlero: Learning how to practice to enable fast playing. Using Alexander Technique to focus on breathing, allowing your body to co-ordinate the right and left hand, without thinking about it. Looking at the position of the right arm on the top string, playing loud, and relaxing the right arm, rather than tensing it up. • P48 A third way to shift: Contracted Fingering
1. With chordal Fingering
2. Moving the whole hand, including the thumb
3. With contracted fingering • One of the most useful ways of getting around the viol to other positions! Looking at transferring the weight to one finger and moving the next finger adjacent to it, leaving both fingers down, with a finger left over. This technique does not work if you don’t have these contracted fingers down together.
• No 1 Working on the fluency of the movement when it gets faster.
• No 2 Using the same contracted technique, but on a string cross.
• No 3 Finding F sharp on the F string with contracted fingering and shifting back to first position. • P49. Mrs Nichols Almand: Using contracted fingering and a whole hand shift. Starting with Chordal Fingering, fingering in thirds and relaxed right arm on the top string. Remembering to keep 3rd finger down with 4th finger, to support it. Chapter 5
• P40 Sinkapace Galliard: Looking at how a Galliard goes towards the 4th note, whether in 3 / 4 or 6 / 4. Practising the open string version with dynamics. Getting faster and how to practice doing it. Focusing on breathing to enable relaxation and therefore better co-ordination with the right and left hand.
Lesson 10 Confident Shifting between First & Half Positions
Viol Player Book 3
P54 Scales with different bowings to aid co-ordination. Slurs in 4s on semiquavers and without. Building up the scale with adding more notes each time from the bottom and focusing on breathing the faster it goes.
Chapter 5
• P43 No 29 Come Vyolle Come: Sight reading the open string version and including dynamics and wrist movement. Looking at good bowing technique and starting work out what is happening automatically. Learning to play with a controlled bow when playing slowly. Considering the use of the 2nd and 3rd finger on the bow to make loud and softs; looking at specific places where to do this. Practising quietly and how important it is to do it. Chapter 6
• P51 Recercada I – La Spagna: With lots of shifting and avoiding looking at the left hand when doing so. Looking at contracted fingering as an alternative to shifting with the whole hand. Building confidence with shifting to make it fluent as well as playing with an expressive bow. Viol Player books come with play along CDs or downloadable mp3s and are available from; www.rondopublishing.co.uk
https://earlymusicshop.com/
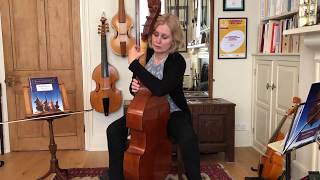
Bass Viol Elementary Lesson 1: Posture and Pizzicato with Jacqui
Viol Player Book 1
Chapter 1
P24 Up and Down Again
P40 Soldier’s Call
• Looking at good posture, not arching your back, with knees over feet. Holing the viol with the right side tucked in.
• Does a rubber cloth help in the initial stages of learning the viol? The advantages and disadvantages.
• Learning the names of the strings from the middle out, rather than from the bottom string up.
• Left hand position and the relationship of the thumb to the second finger. Keeping the thumb bent out with the point of contact on the side. Transferring weight to each finger and not pressing too hard.
• Placing of the fingers correctly on the frets so each plucked note rings. Impossible to get a good sound with the bow if the finger on the fret is not placed correctly.
• How to play pizzicato.
• Learning in such a way that the left hand can go on autopilot, playing with your eyes closed and visualising the notes.
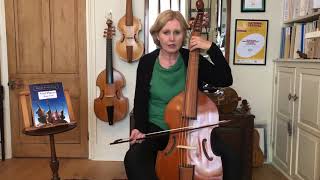
Bass Viol Elementary Lesson 2: How to hold the bow and bowing with Jacqui
Viol Player Book 1
Chapter 1
• Feeling the weight in your arm by swinging it.
• Hold your right arm, with your left hand and wiggle it! Feel the wrist move as a reflex action to having a floppy arm.
• Bow hold: Put your bow on lap – horse hair on knuckle, 2nd finger through the hair and stick. The thumb tickles the stick and the 1st finger is passive and cradles it. Bow hold is only complete when bow is on string. What does it feel like?
P24 Up and Down Again
• How much to tension the bow hair: Depending on the density of the stick, but if it looks like Robin Hood can ping arrow from the bow, it’s too tight! If it’s too loose, it’s difficult to hold and wiggles around.
• Being comfortable: Take a picture on your phone for a physical reference to your body and the position of your viol.
• Bow under the strings – before you apply rosin! Feel the movement of hour relaxed arm.
• When you hold the bow, think of the arm coming ‘up’ from under – this will help to keep the elbow down (especially if you play modern strings). Make sure your palm is vertical and the is bow is turned away so it looks like you’re playing on the wood of the stick. If the palm of the hand is not vertical the bow hold can feel very insecure.
• Check you bow hold: Take off your 1st finger and thumb from the stick and see if the bow remains on the string and feels secure. Take your bow off the string with your left hand and it should ping back onto the string.
• Hold the bow in the left hand at the tip and put the bow on a string and move the arm up and down the bow. Close your eyes and feel the movement of the arm.
• Starting to bow on the middle two strings.
• For bowing think push and pull rather than up and down and this can help modern string players to not get the bow stoke mixed up. Think of racket sports and a strong stroke with a bat is the same as a forehand stroke and a back hand being the same as a pull bow.
• Push is strong and pull is weak; tension and resolution.
• How to rosin the bow.
• Looking after your viol: Always wipe the strings, the belly of the viol and the stick of the bow with a duster when you have finished playing. It’s very easy to get a build up of rosin on the string and not make good contact with it.
• P14 Bowing & Viol Aerobics in 8 bows to each string and continuing with 4, 2 and 1 move bow forward and back - not up and down.
• To keep the bow parallel to the bridge, imagine you are bowing under a table (apart from the top string).
• Use right leg as a runway to keep the bow level. (apart from top string)
• Close your eyes and remember physical references to help embed muscle memory.
• P24 Up and Down Again; arco (with the bow). Separate each hand by learning skills separately: play without the left hand and bow the string the notes are on.
• Bow on string – breathe in and out.
• When string crossing in bar 8, the bow comes back, not down.
• P14 N25 Singing Cucumber – arm forward and back. Memorise, play with your eyes closed and feel the bow stroke changing from string to string. Little challenges. Important to learn these skills by putting them on autopilot.
• 15. Up and Down Again – both hands finishing with 2 fingers down and a relaxed right arm.
Lower Intermediate Bass Lesson 1: Chordal Fingering
Looking at the technique of Chordal Fingering and how it maintains the resonance of the viol. How do you know when to use it and does it really make life easier?
Viol Player Book 2, Chapter 4 Exercise 1, 2, (eyes closed).
In this lesson we recap on some of the bowing technique learnt in the Elementary Lessons to enable a beautiful sound. Also starting to build a repertoire of good habits! For example:
• putting the left hand on the viol without looking
• putting your bow on the string, breathing in and out, relaxing and sinking into the string with good sense of bow arm weight
• Keeping the same hand shape using chordal fingering in first position using fingers 2-3 and half position with fingers 3-4. P 33 Fanfare No 33 No 3:
Covering notes for bass lines and putting your left hand on autopilot!
p.38 Rondeau:
looking at changing hand shape from chordal fingering to normal hand position.
Playing with dynamics using the 2nd and 3rd finger on the bow:
• 2nd (or middle) finger can provide more weight (or pressure) on the horse hair, making the sound louder
• 3rd (or ring) finger supports the weight of the bow hair, making the sound quieter.
In conclusion: Chordal Fingering: don't jump on the same fret with 2-2 or 3-3, just add a finger 2-3 or 3-4.
Lower Intermediate Bass Lesson 2: How to play elegant dotted rhythms
How to play elegant dotted rhythms. Understanding the relationship between different types of compound time signatures: 6/4 and 6/8 How well do you know your C major scale? Looking at c major in first position with F on the C string. C arpeggio with chordal fingering P38. Viol Player Book 2 Lull me Beyond Thee p37 : Using a 4th finger or an open string to avoid string crossing for one note. The un-cluncky quaver: bow distribution for dotted rhythms and playing short bows for short notes. Skye Boat Song p45 Looking at slurs on 3 notes and bow direction across 4 strings. Bowing long notes and feeling free and relaxed.
Lesson 7 Shifting using Chordal Fingering and How to Play Faster
Lesson 8 Stuck in Half Position? & Sight Reading Tips

Lesson 9 Playing fast with Alexander Technique

Lesson 10 Confident Shifting between First & Half Positions
Bass Viol Elementary Lesson 1: Posture and Pizzicato with Jacqui

Bass Viol Elementary Lesson 2: How to hold the bow and bowing with Jacqui
Lower Intermediate Bass Lesson 1: Chordal Fingering
Lower Intermediate Bass Lesson 2: How to play elegant dotted rhythms